Registering a Face
Register a face to run actions when that person appears. You do not need to take separate photos: pick the person's face card from saved recordings and name it.
Before you begin, turn on face recognition and make sure the person has been recorded and indexed since then.
- In History > Cards, select Faces at the top left of the list. Cards grouped by face appear. If person recognition is off, face cards are shown by default.
- Click the card of the person to register. The person's journey list opens, with one tile per stay.
- Select the photos to register with the checkbox at the top left of each tile, or by touching and holding a tile on a phone. You can select several. The representative photo of each selected stay is registered.
- In the selection bar above the list, click Register. The row Register the n selected photos as whom? appears.
- Choose a name. For a new person, choose + New face and type a name. If you type a name that is already registered, This name is already registered. To add photos to this person, pick it from the list is shown and the photos cannot be registered. Choose the existing person from the list instead.
- Click Register. When finished, Added n photos to (name) is shown. If some fail, Couldn't register n photos. is shown.
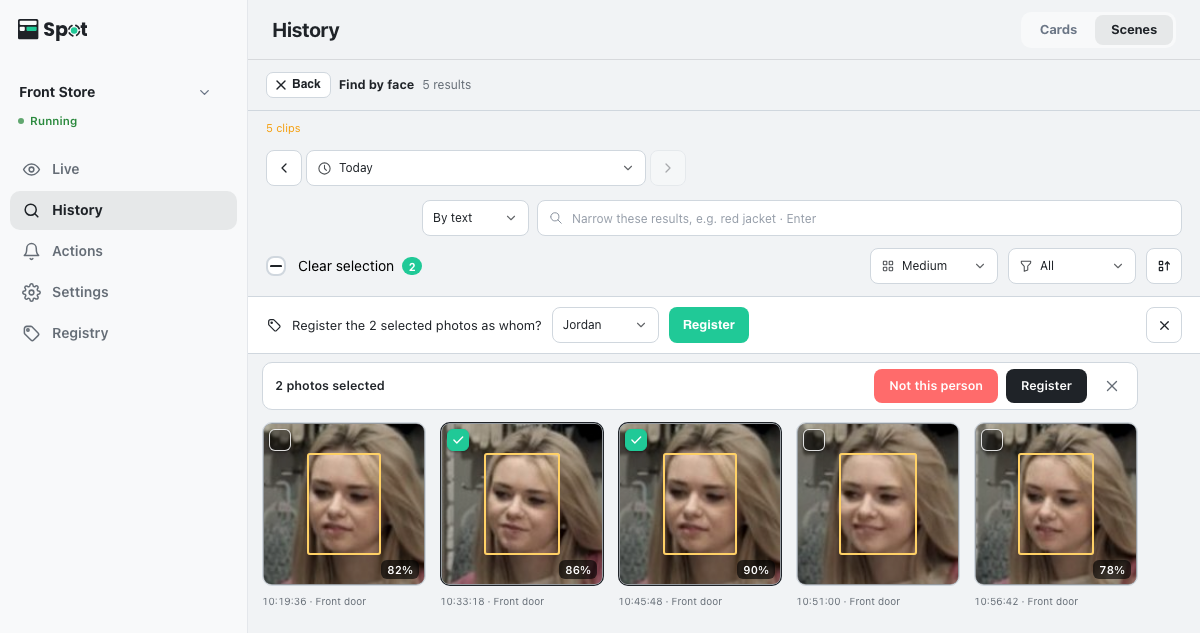
You can register the same way from the results of Find by face on a face box selected on the timeline (see Finding a Person).
You can also register without opening a card. In the face card list, select cards with their checkboxes and click Register in the selection bar; the representative face of each card is registered. A card with a single stay plays as soon as you click it, so register it this way.
The face is registered when the name appears in the registered faces list on the Registry tab. The person can now be chosen for Specific face detected on the Actions tab.
Name rules
Names cannot contain a comma (,) or colon (:).
Managing and deleting registered faces
The Registry tab shows the registered people and the number of photos each has. If vehicle recognition is also on, select Faces (desktop: at the right end of the title row; phone: from the list at the top of the screen). The Registry tab is shown while face recognition or vehicle recognition is on.
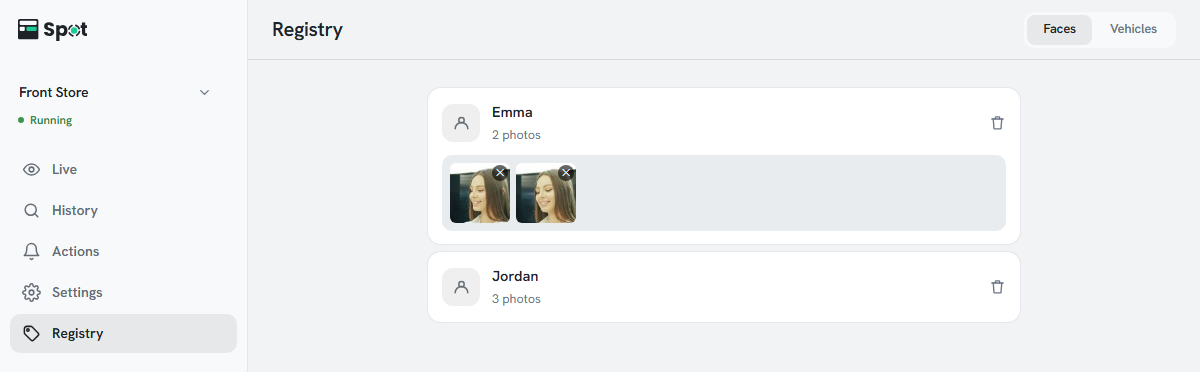
- Click a name to expand that person's registered photos. The ✕ (Delete sample) at the top right of a photo deletes it immediately.
- To delete a person, click the trash icon at the right of their row and confirm. Deleting removes all of that person's registered photos, and from then on the person is detected as an unregistered face. Existing records and video are kept.
- While every camera is off, registered photos cannot be loaded and Couldn't load the registered photos. Photos can't be shown while the camera is off. is shown.
| To delete | How |
|---|---|
| Registered faces | Delete them in the registered faces list on the Registry tab. |
| Face data in recordings | Deleted automatically with the recording when the storage period ends. |
| Future data | Turn off face recognition to stop collecting new face data. |