Adding a Camera
While the device is running, Litmus detects the targets you turned on (people, faces, vehicles) and records on every camera you add. You do not need to set up any actions for Litmus to record.
Before you begin, make sure the app is connected to the device (see Connecting the Device).
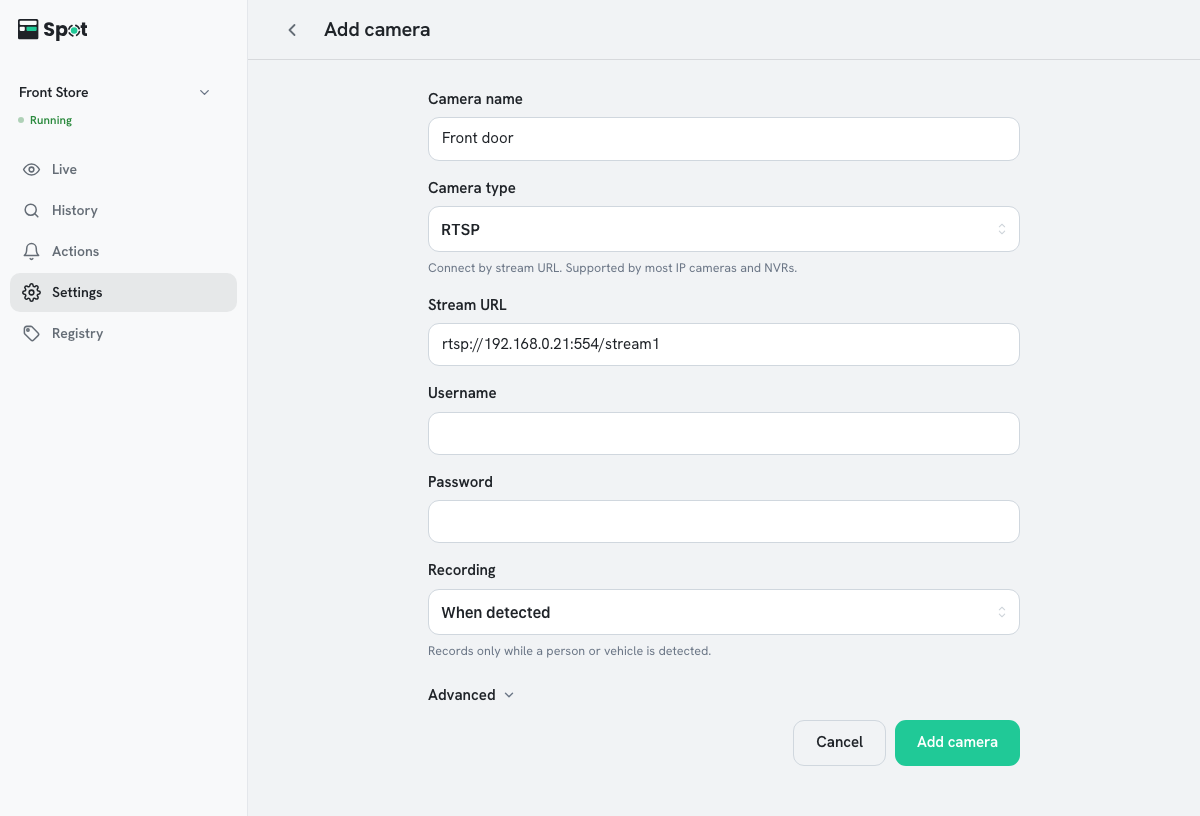
- Go to Settings > Cameras and click Add camera. If there are no cameras yet, the same button also appears on the Actions tab, and on the Live tab when the app is connected to the device.
- Enter a recognizable name in Camera name, such as Front door.
-
Under Camera type, select the connection method and fill in the fields.
Camera type Input RTSP Supported by most IP cameras and NVRs. Enter the Stream URL, Username, and Password. To find the URL, see Finding a Camera's RTSP Address. Example: rtsp://192.168.0.10:554/streamONVIF Searches the local network for IP cameras. Select the camera in the search window and enter the username and password. USB / UVC A USB webcam or built-in camera connected directly to the device. Select it from the list. -
Choose how to record under Recording. When detected is selected by default.
Recording What it does When detected Records only while a person or vehicle is detected. Always Records 24/7, even when nothing is detected. Uses much more storage, and the oldest footage is deleted first when space runs low. - Click Add camera. The You have unsaved changes bar appears at the bottom of the screen.
- Click Save on that bar. If the device is running, the Restart device dialog opens. Click Apply.
- If the status is Stopped, click Start in the notice at the top of the Live tab, or in Settings > Status. New devices start out stopped. Until you start the device, the tiles show No signal.
The camera is ready when its video appears on the Live tab.
Editing, turning off, and deleting a camera
- Edit: in Settings > Cameras, click a camera row to open the Edit screen. Change the values, click Save, then click Save on the save bar at the bottom. If you rename a camera, past recordings also show the new name.
- Turn off: use the switch on the camera row. The row reads On or Off. A camera that is off stops analysis, recording, and actions; saved recordings are kept.
- Delete: click Delete this camera at the bottom of the edit screen. The camera and its actions are deleted; actions that use several cameras keep running on the remaining cameras. Existing records and video are kept on the History tab.
Turning off and deleting a camera also take effect only after you click Save on the save bar. Until then, Cancel on the save bar undoes them.
Face recognition and vehicle recognition are the only features that have to be turned on separately.
Advanced: substream and audio recording
On the add or edit camera screen, click Advanced to show the items below and detection zones. A camera that already has values here opens with the section expanded. Available with device software 2.2.0 or later; on 2.1.4 or earlier, detection zones are always shown.
| Item | Description |
|---|---|
| Substream URL (optional) | The address of the camera's lower-resolution stream (RTSP only). Litmus uses it for detection to reduce device load and keeps recording the main stream at full quality. It uses the same username and password as the main stream. For address formats, see the substream entries in Finding a Camera's RTSP Address. If no substream video arrives for more than 20 seconds, detection continues on the main stream. |
| Record audio | Saves the camera's audio with recordings. Off by default. Cameras without audio record video only, and USB / UVC cameras do not record audio. Live audio is available whether or not this is on. |
Drawing detection zones
To watch only part of a camera's view, draw detection zones. With zones in place, Litmus records and runs actions for only the people and vehicles inside them (and animals, while animal recognition is on), and only those appear as cards on the History tab. Notifications and events show the zone name, as in Front door · Zone 1.
- In Settings > Cameras, click the camera to open the Edit screen.
- Click Advanced to expand it, then under Detection zones, click Add zone. You can draw zones only after the camera is saved and while the app is connected to the device. On device software 2.1.4 or earlier, Detection zones is shown without Advanced.
- Drag the corners of the shape on the live view to fit the area. Drag the + handle in the middle of an edge to add a corner. Enter a Zone name and click OK.
- Click Save on the edit screen, then click Save at the bottom of the screen.
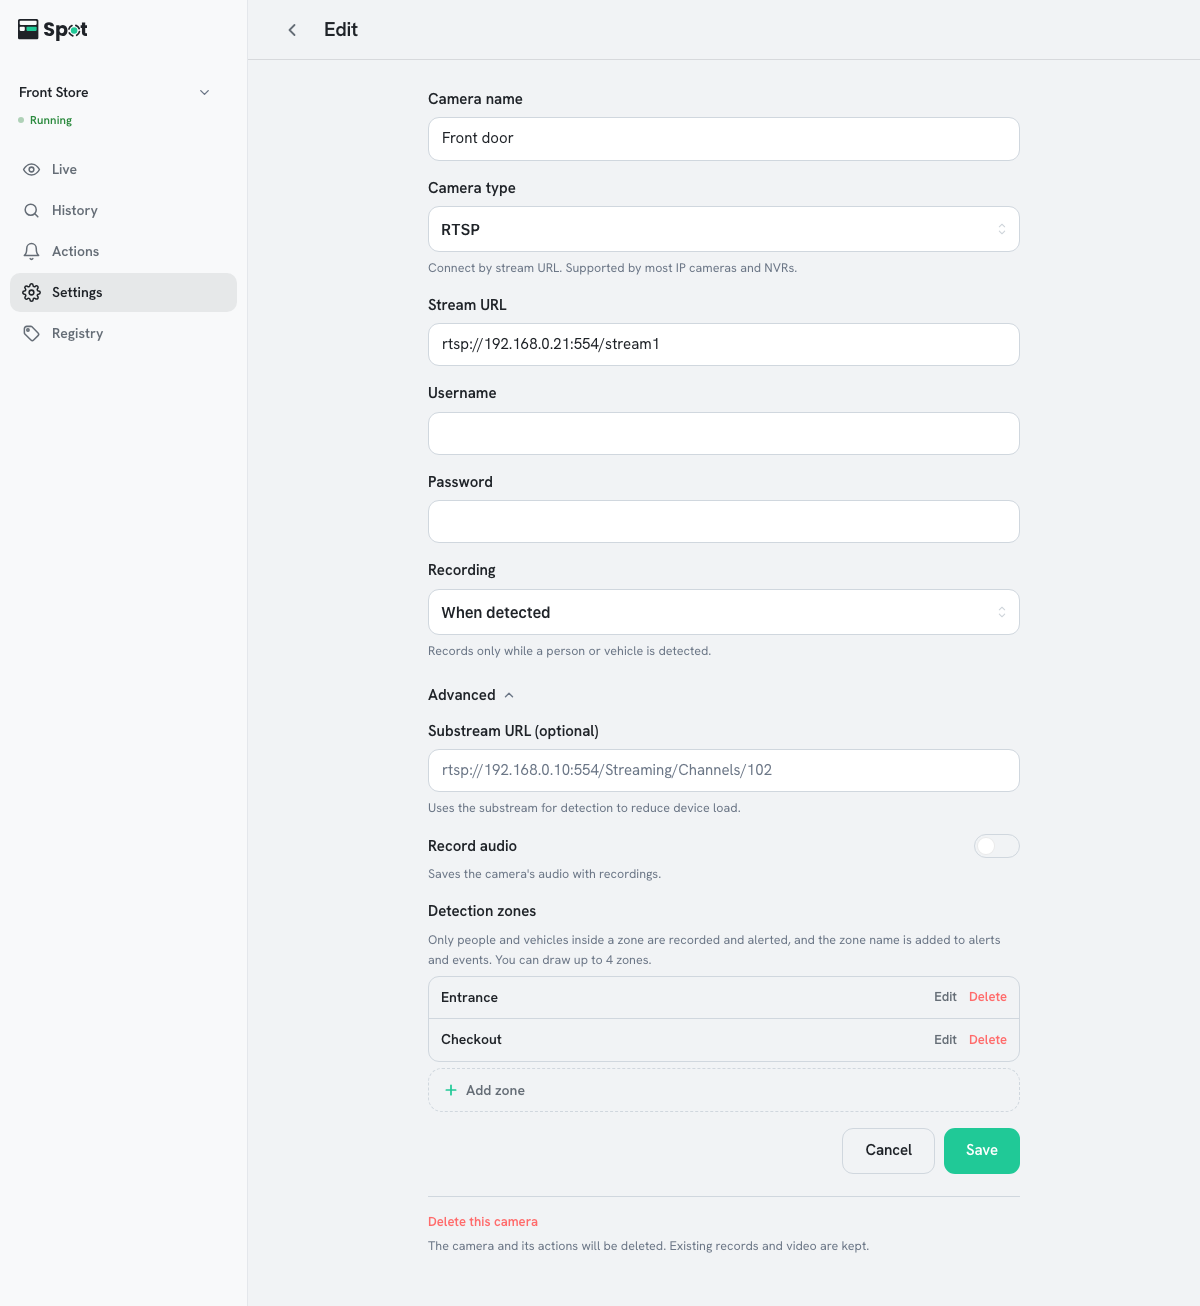
- You can draw up to 4 zones per camera. With several zones, entering any of them triggers recording and actions.
- A person or vehicle counts as inside a zone when the bottom center of its detection box is inside it.
- On live video, each zone is drawn as an outline with its name.
- When recording is set to Always, Litmus keeps recording regardless of zones. Zones apply only to detection, actions, and cards.
- Events and cards created before you drew the zones are not changed.
- To change or remove a zone, click Edit or Delete next to its name, then save the same way.