Viewing by Person
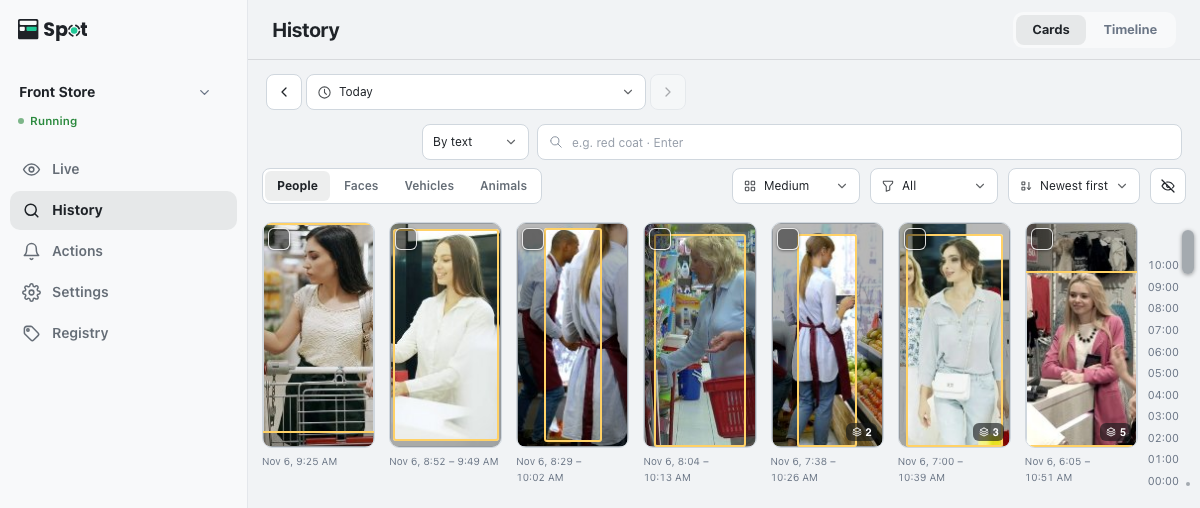
History > Cards shows each person who appeared in the time range as one card. Click a card to see all the recordings of that person together. At the top left of the list, choose which cards to see: People, Faces, Vehicles, or Animals. Only the kinds of recognition that are on are shown; on a phone, choose from the list. Selecting Cards again returns to the kind you viewed last. On device software 2.1.4 or earlier, select People or Vehicles with the switch at the top of the screen.
- Open the History tab. Cards is shown first. Select People at the top left of the list.
- Click the range above the list and choose the range to view.
- Click a card. The person's journey list opens, with one tile per stay in time order. If a card has only one recording, it plays immediately, and closing the video returns you to the card list.
- Click a tile to play the video. To return to the list, click Back at the top.
With many cards, drag the time bar along the right edge of the list to jump straight to the cards at a given time.
Reading the journey list
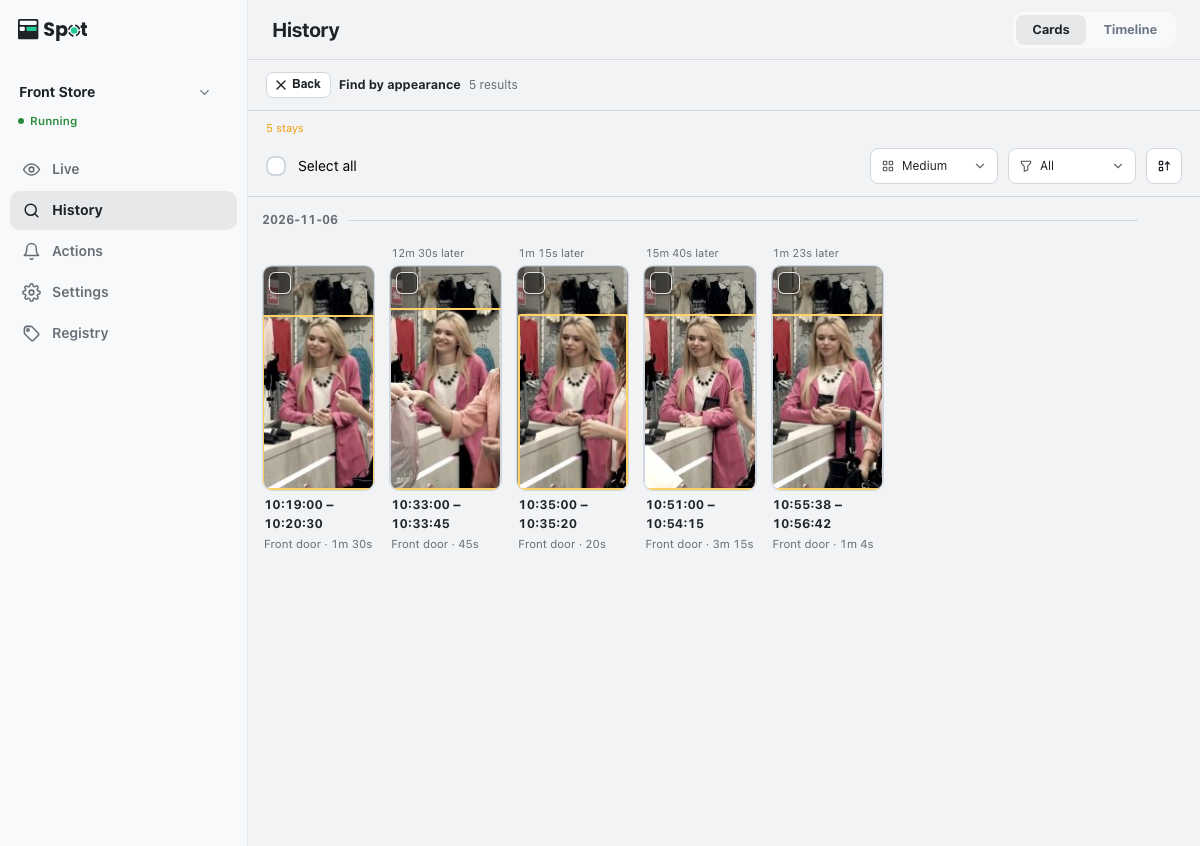
An open card shows, in time order, when and on which camera the person appeared.
- Appearances on one camera with gaps of 60 seconds or less are grouped into one tile, even across separate recordings.
- Below each tile are the time of the stay in bold (such as 14:02:10 – 14:05:42) and camera name · duration. A stay shorter than one second shows only its start time and no duration.
- The duration is the time from when the camera first detected the person or vehicle until it last detected them.
- Above each tile is the gap from the previous tile, such as 5m later. Overlapping times show Same time. A date divider appears where the day changes.
- The list starts with the oldest stay. Clicking the sort icon reverses the order, and the gaps then read like 5m earlier.
People cards are grouped by appearance (clothing and build), which works without face recognition. While face recognition is on, select Faces to see cards grouped by face. On device software 2.1.4 or earlier, the same place shows an Appearance / Faces switch.
Tidying up cards
- Someone else is mixed in: open the card, select that tile, and click Not this person above the tiles. The tile moves out of the card into a card of its own. In a journey list, only the tile's representative recording is detached; if other recordings of that stay remain, one of them becomes the new representative and the tile may stay.
- One person is split across cards: merge the cards as described below.
- Something that is not a person became a card: select the card and click Hide above the list.
Merging cards of the same person
- Select the checkbox at the top left of two or more cards of the same person. When you select a card, a selection bar appears above the list. Merge appears once two or more cards are selected. To clear the selection, click the × (Clear) at the right end of the bar.
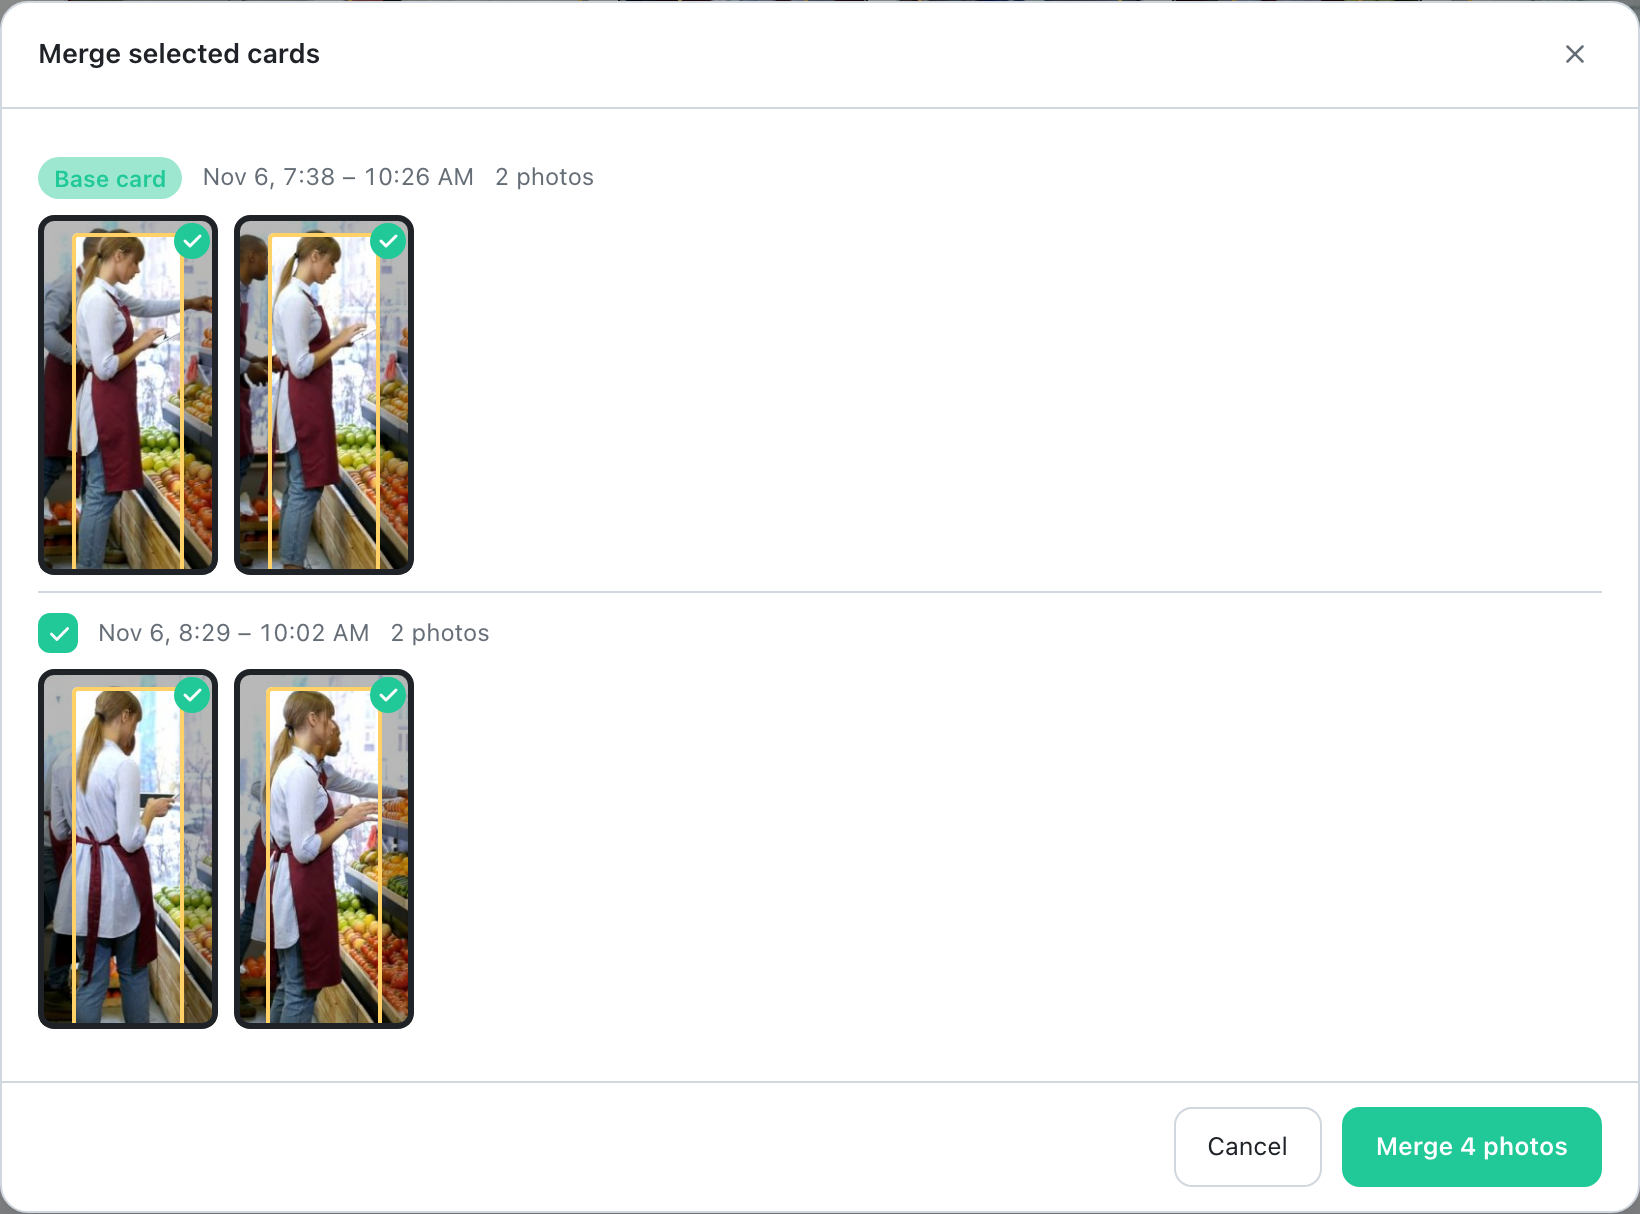
- Click Merge. The Merge selected cards window opens. The card that appeared first is the Base card. Each photo stands for one stay, so the number of photos matches the number on the card. All photos start selected.
- Review the photos and clear any photo of someone else. To leave out a whole card, clear the checkbox next to its heading. Up to 8 photos are shown per card; +n more shows the rest.
- Click Merge n photos.
Merge suggestions
When cards are likely to be the same person, n card pairs may be the same person appears above the list. Review opens the Same person? window, which works like the merge window: review the photos, then click Merge n photos, No match, or Skip for now. Candidate cards show n% similar, and the next suggestion opens after you answer. The ✕ on the suggestion row hides suggestions for the rest of the session.
Working with the list (sort, filter, hidden cards, new cards)
- The card kind switch (People, Faces, Vehicles, and Animals, for the kinds of recognition that are on) is at the top left of the list; the card size, camera filter, sort, and hidden items icons are on the right. On a desktop, the range picker and the search row share one row.
- The grid icon sets the card size: Small, Medium (default), or Large. On a phone, the sizes change how many cards fit in a row (Appearance 4, 3, or 2; Faces 3, 2, or 1). The same size applies inside an open card.
- The sort menu offers Newest first (default), Oldest first, Most seen, and Least seen. Most seen and Least seen count the number of stays. The sort menu is hidden while a text search is active.
- With two or more cameras, the camera filter selects All or the cameras to show. The selected range and camera filter also apply inside an open card.
- The hidden items icon at the top right of the list shows hidden cards. To show a card again, select it there and click Unhide above the list.
- The number at the bottom right of a photo is the number of stays, which equals the number of tiles in the open card. Hovering over it shows a label such as 3 stays.
- While the list is scrolled, new cards do not shift it. n new people appears instead; click it to show them and scroll to the first new card. New cards show a New label for a short time.
- When sorted by Newest first or Oldest first, the time bar along the right edge shades the times that have cards. While you drag its handle, the time at that position is shown; when you release it, the list jumps to the cards at that time. On a desktop, time labels appear beside the bar, and clicking the bar also jumps to that time. The back-to-top button (up-arrow icon) at the bottom right returns to the start.
Narrowing cards by text or attributes
In the search row below the range picker, set a condition with By text or By attributes to show only the cards of people who match. The number found (Found: n) is shown, and the × icon (Clear) at the right of the field removes the condition. Text matches are ordered by how well they match. This is available only while People is selected.
- Pressing Esc in the search box also clears it.
- The condition is kept separately for each view (such as People, Faces, and Vehicles). When you return to a view, its condition is applied again.
- If the search fails or runs out of time, the reason is shown with Try again and Clear search. Clear search returns to the list before the search.
More you can do in an open card
- Until you close the card, photos removed with Not this person can be restored: expand Removed: n, select them, and click Undo above the tiles.
- On a Faces card, photos can be picked to register a face (see Registering a Face).
- Recordings cannot be deleted from a card view. Use Delete range on the timeline instead (see Downloading and Deleting a Range).
- Where faces appear small, such as with ceiling cameras, People is more reliable than Faces.
How cards are formed
Cards are formed when footage is indexed, are stored on the device, and are not regrouped automatically afterward. Changing the time range shows the cards of people who appeared in that range, with the times, the number on the photo (stays), and the representative photo calculated for that range. Settings > Indexing > Same-person threshold applies to footage indexed from then on.